I was creating a custom Stellar token for a customer, and noticed Stellar recently updated their Stellar Laboratory interface - so I thought it would be useful to share how you create your own token with this new UI!
This is a real Dummies guide! I won't get into too many details, but I will provide links for you to learn more. This will just take you through step by step to provide you with your own token (known as an Asset in the Stellar world). At the end I'll also breakdown how Stellar tokens get utilised inside Task's economic communities.
Before we begin
There are some requirements before you get started here - you need to have a Stellar wallet that has some Stellar Lumens in it (AKA XLM, thats Stellar's native currency and its used for paying for stuff within the network like setting up new accounts and transaction fees).
If you don't yet have this then I recommend you use LOBSTR or Coinbase to purchase some - you'll need at least 5 XLM in an active walletvto create your own Asset.
About Issuer vs Distributor accounts
You're going to be creating TWO Stellar accounts in order to generate you're own asset:
- Issuer account - is kept separate from the account you'll use to distribute your new Asset. Why? It makes it easy for you to prove to the world the economics behind your asset. For example, you can lock the issuer account after creating a fixed number of tokens, and this lets the world know that no more of your tokens can ever be created.
- Distributor account - receives tokens from the Issuer account, and is the account you will then use to distribute your tokens to other Stellar wallets etc.
The step by step process
1. Create Issuer account
Visit https://laboratory.stellar.org/#account-creator - check that you are using the Public network and click " Generate keypair".
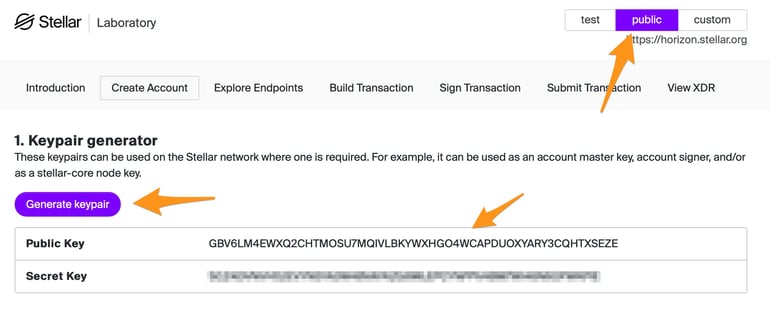
Copy/paste the public and private keys somewhere safe and label this as your Issuer account.
To activité the account it needs some Lumens - so using the public address, send 2 XLM from your funded Stellar wallet we discussed earlier.
2. Create Distributor account
Pretty easy really - just repeat step 1 except:
- Label these keys for your "Distributor" account and
- Activate it by sending 3 XLM from your funded Stellar wallet
3. Trust the Issuer
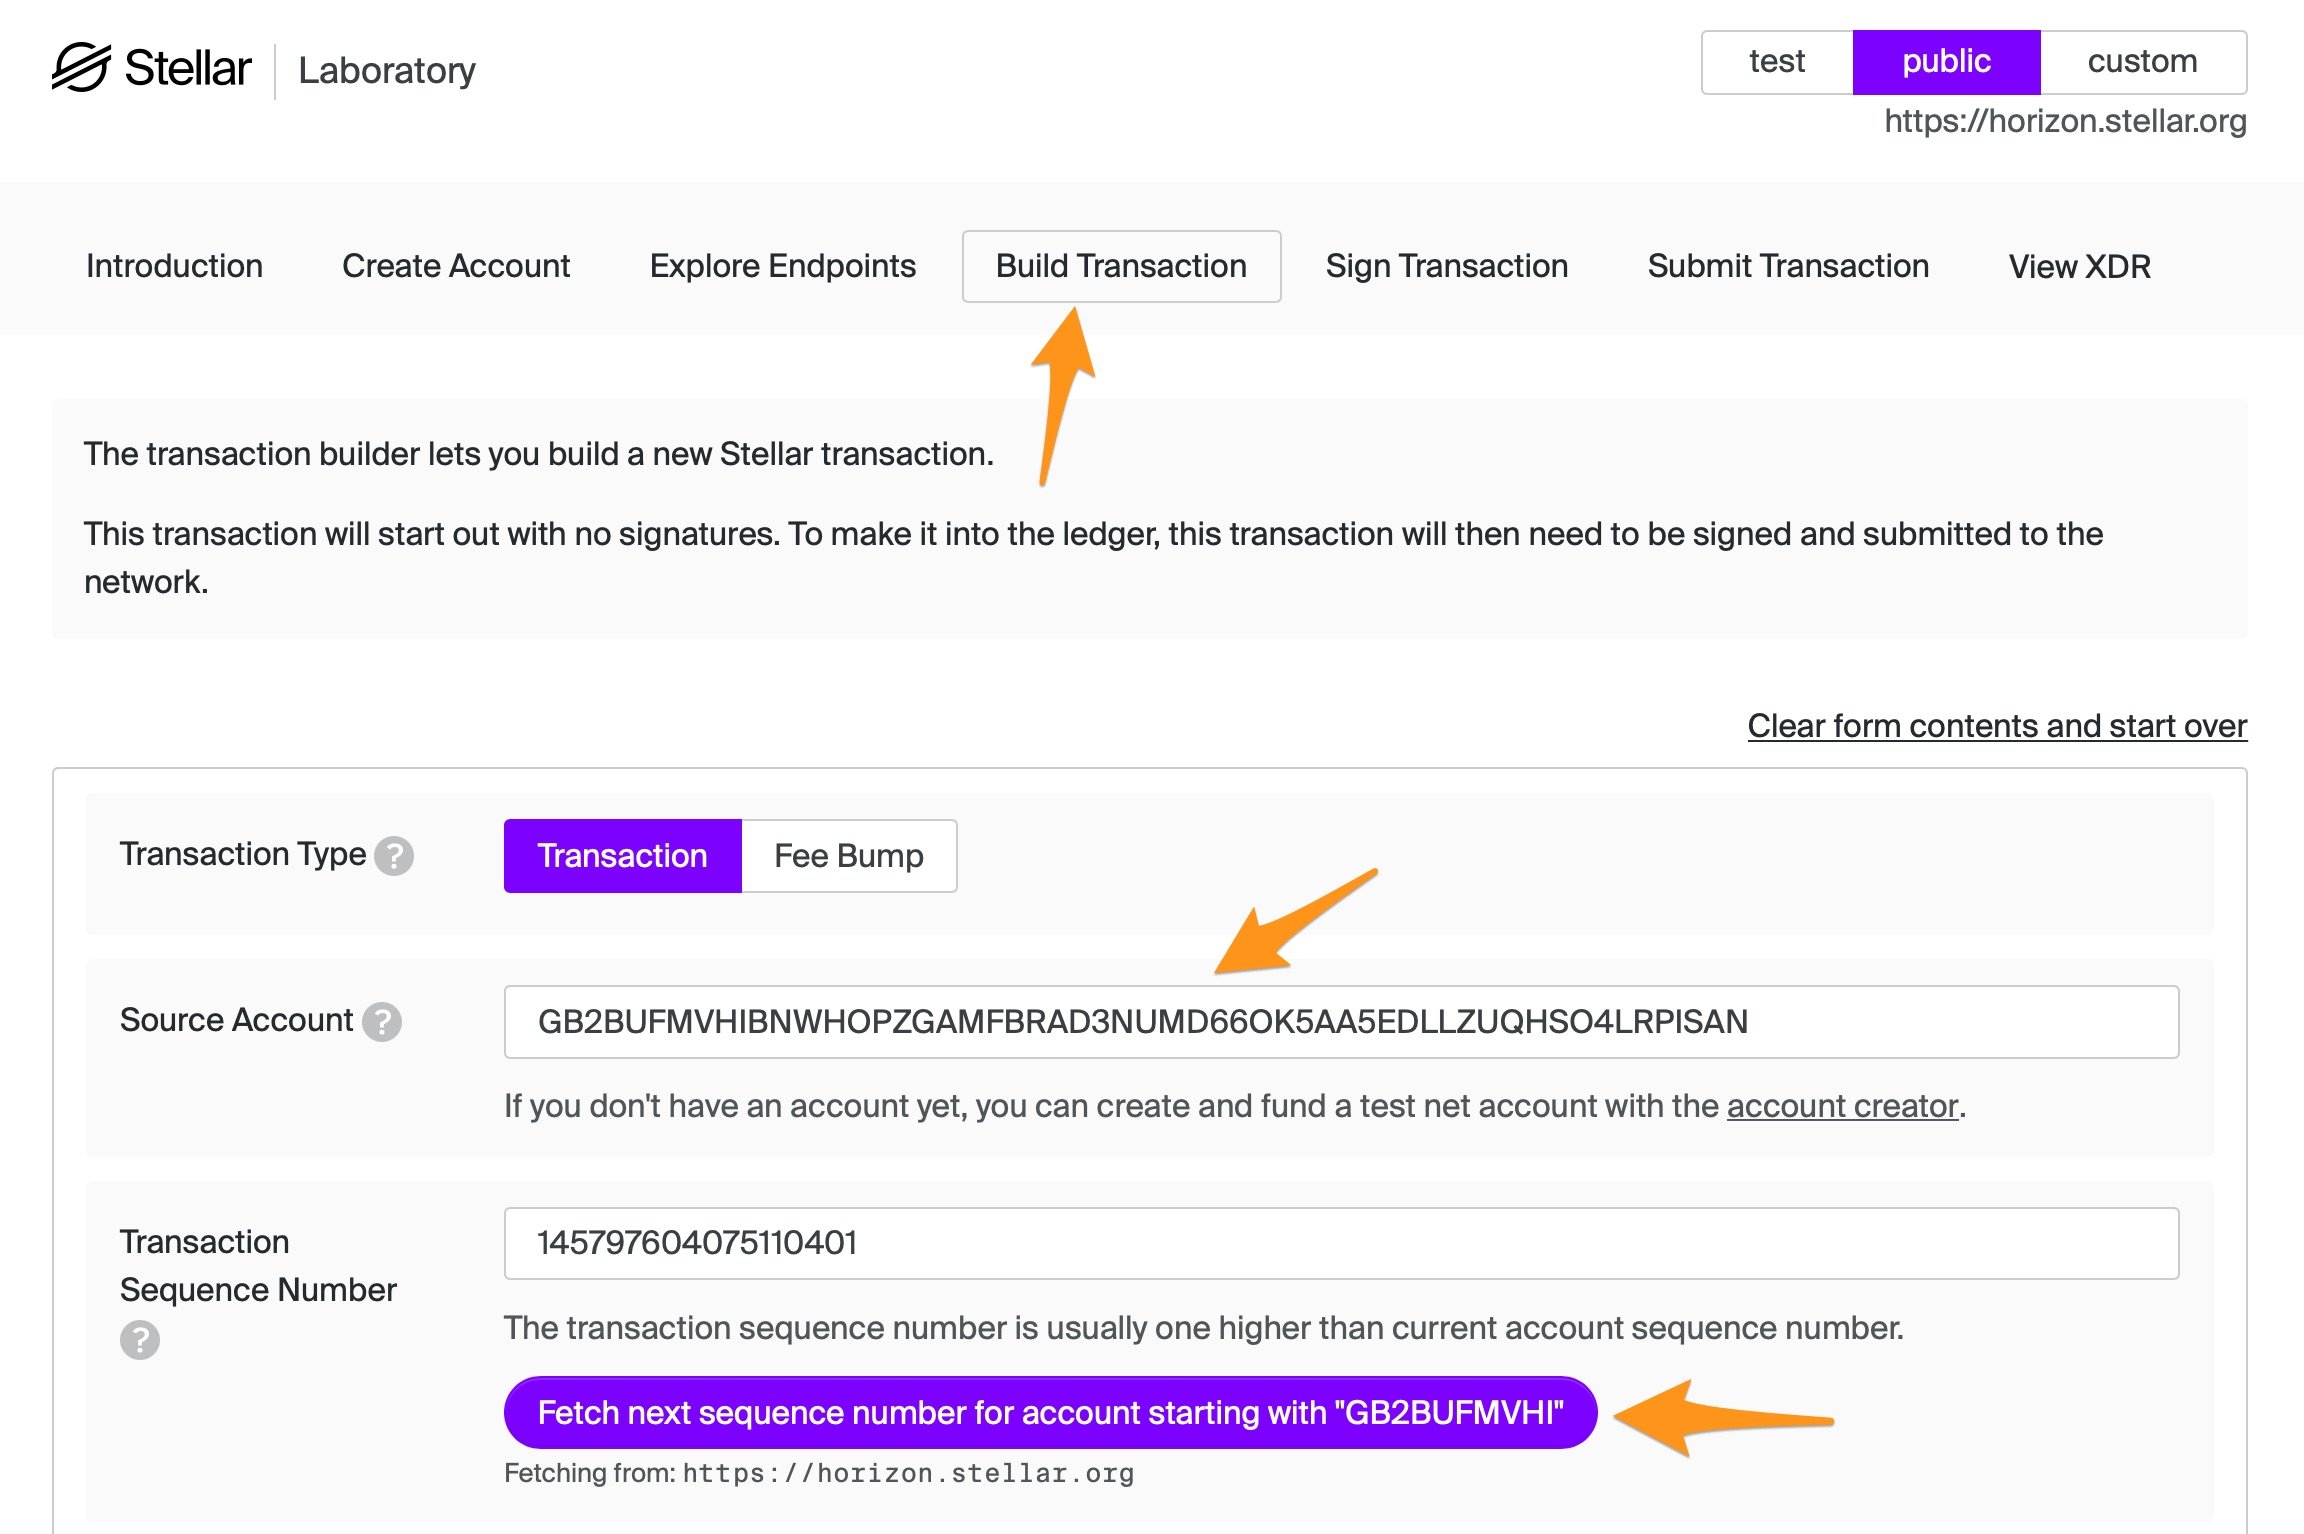
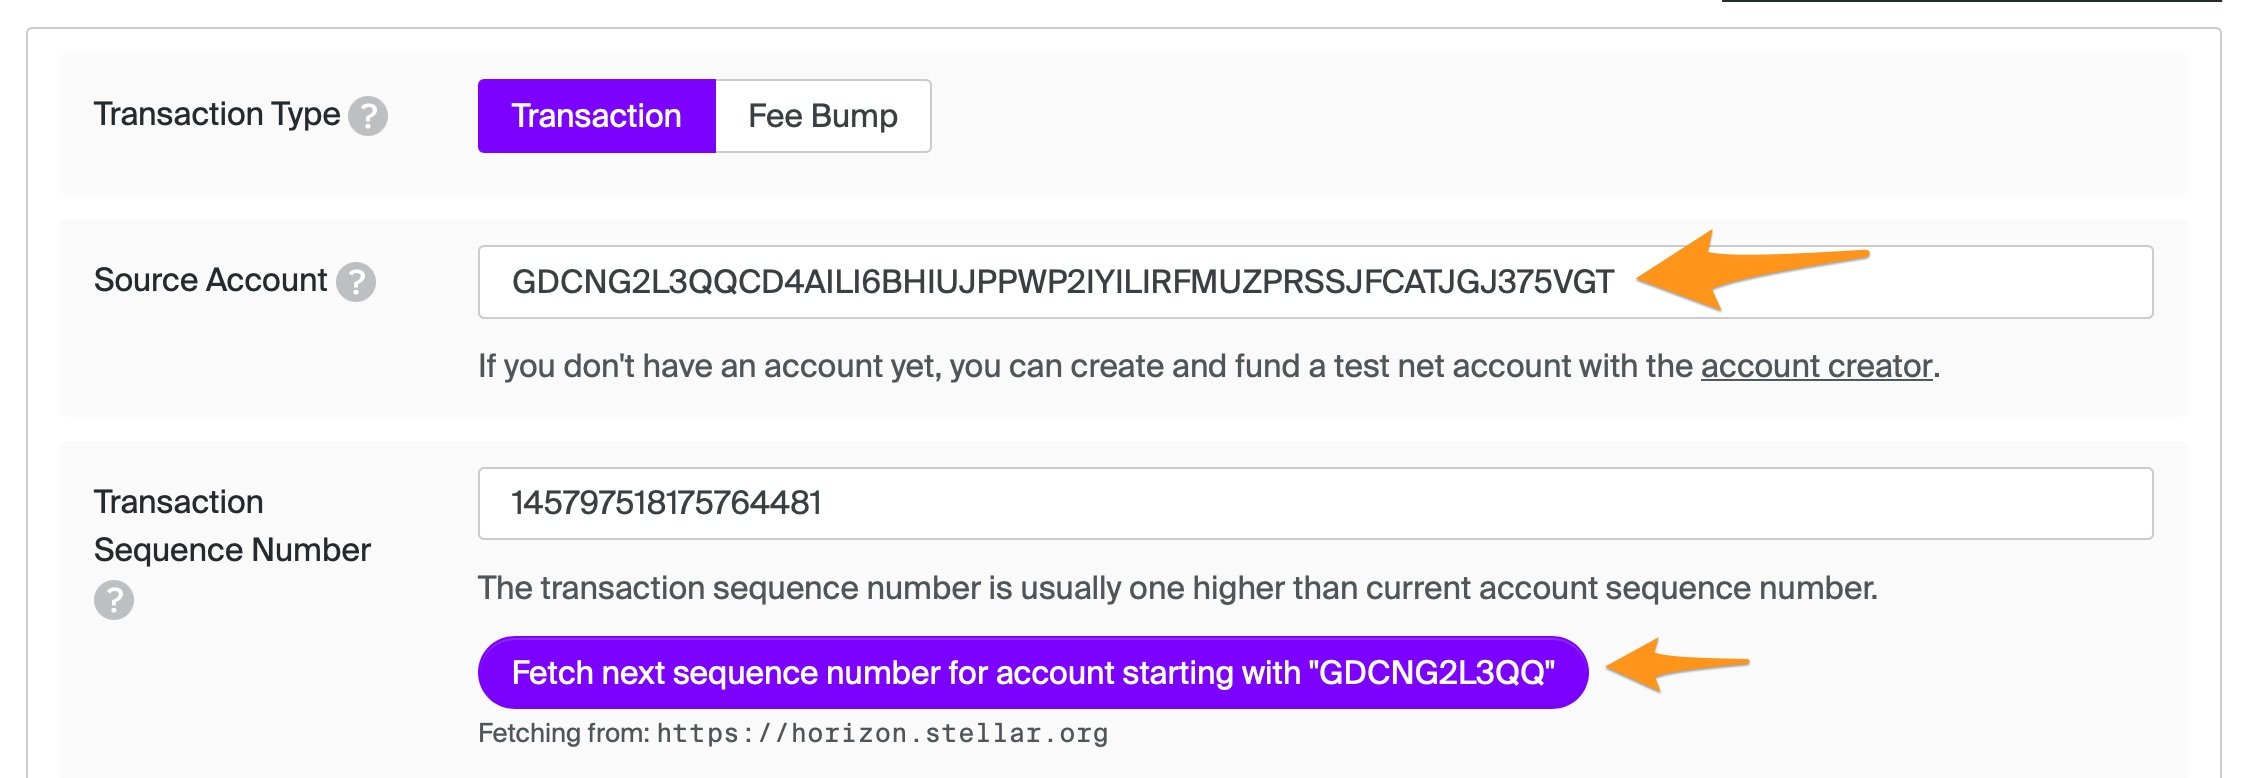
You need your Distributor account to trust the Issuer account - so go to the "Build Transaction page, paste the public key of your Distributor account into the "Source account" field, and click the "Fetch next sequence number..." button:
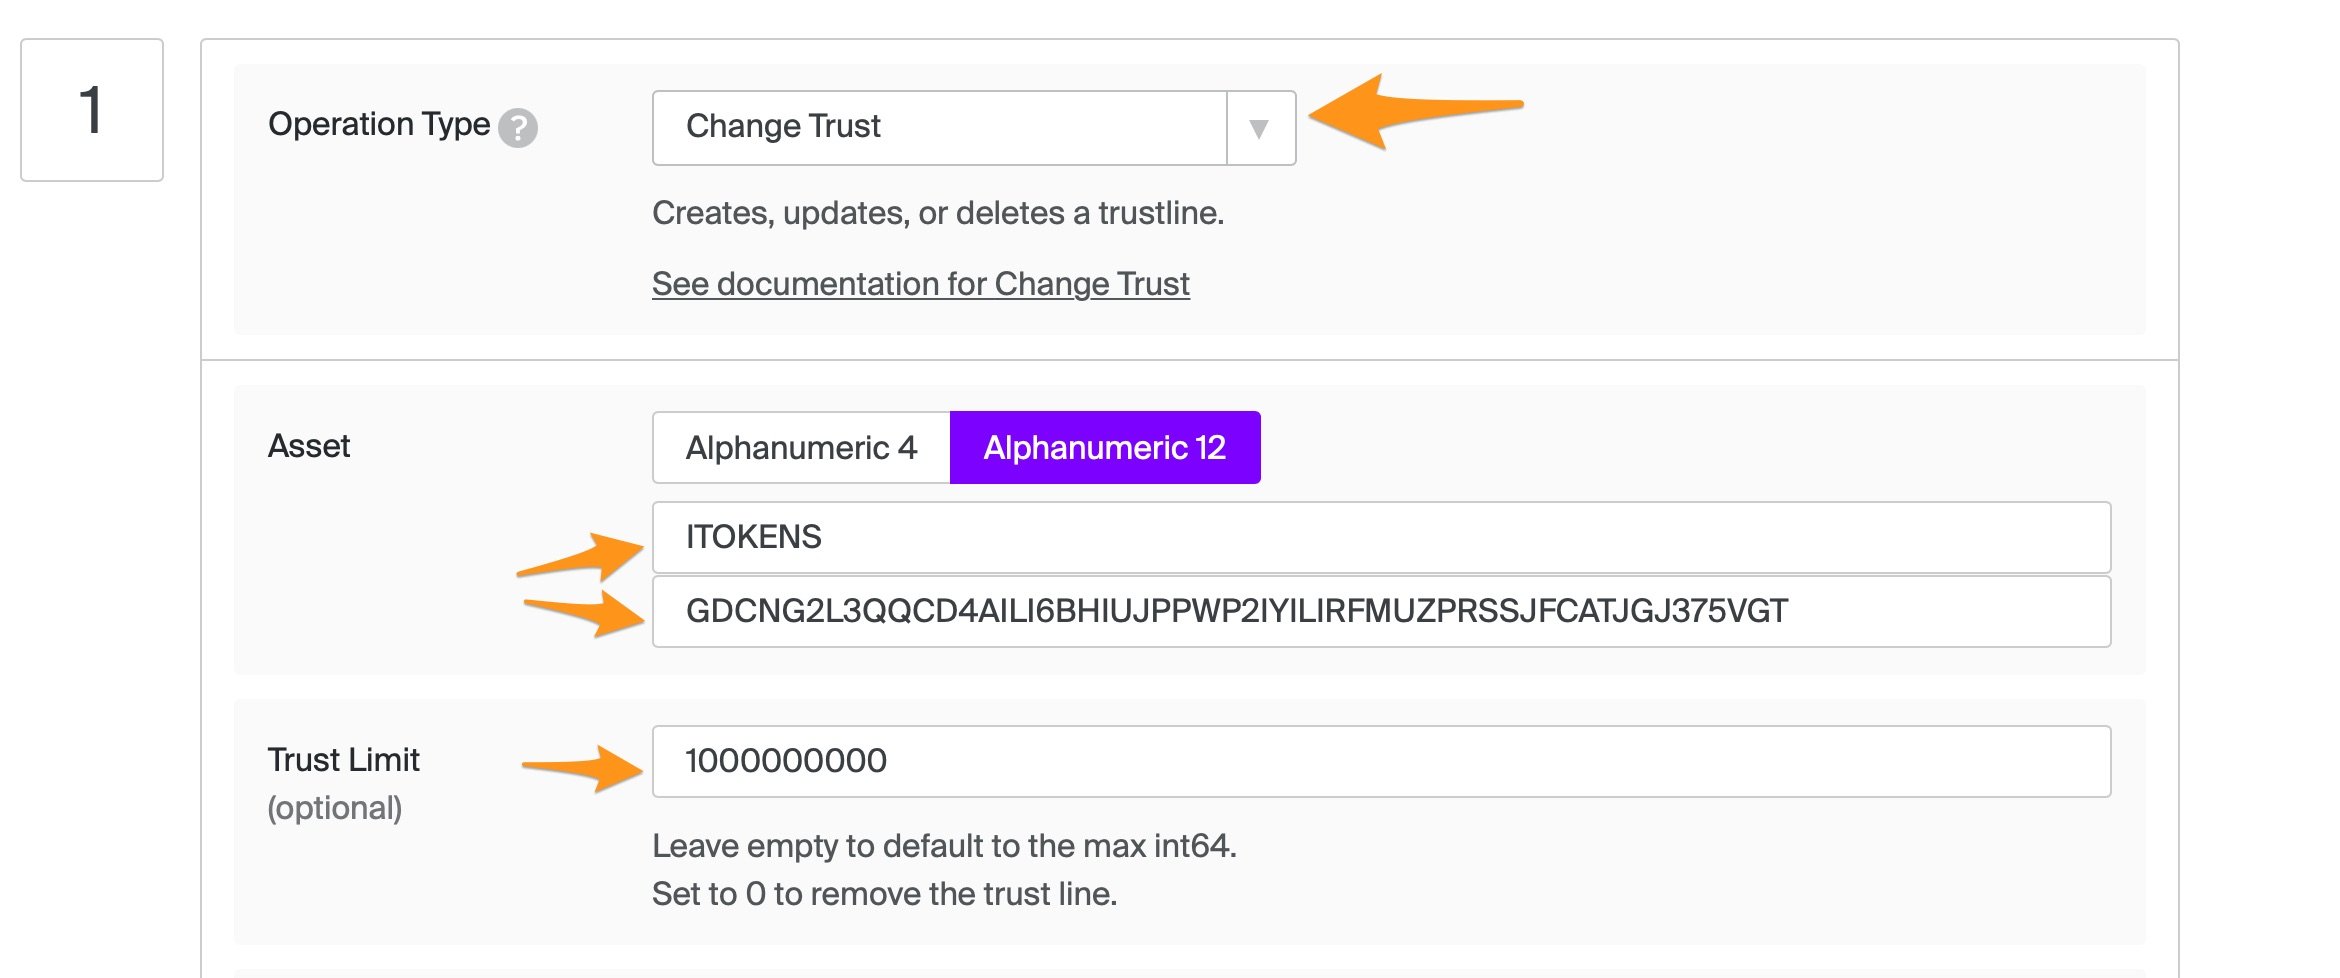
Scroll down the page and select "Change Trust". I chose "Alphanumeric 12" because my token name has 4+ characters, if you are using just 4 characters (e.g. TASK) then choose Alphanumeric 4 instead.
Define the name of the token you'll be creating (mine will be called ITOKENS) and paste your Issuing Account’s public key. The Trust Limit will define how many tokens you'll be distributing.
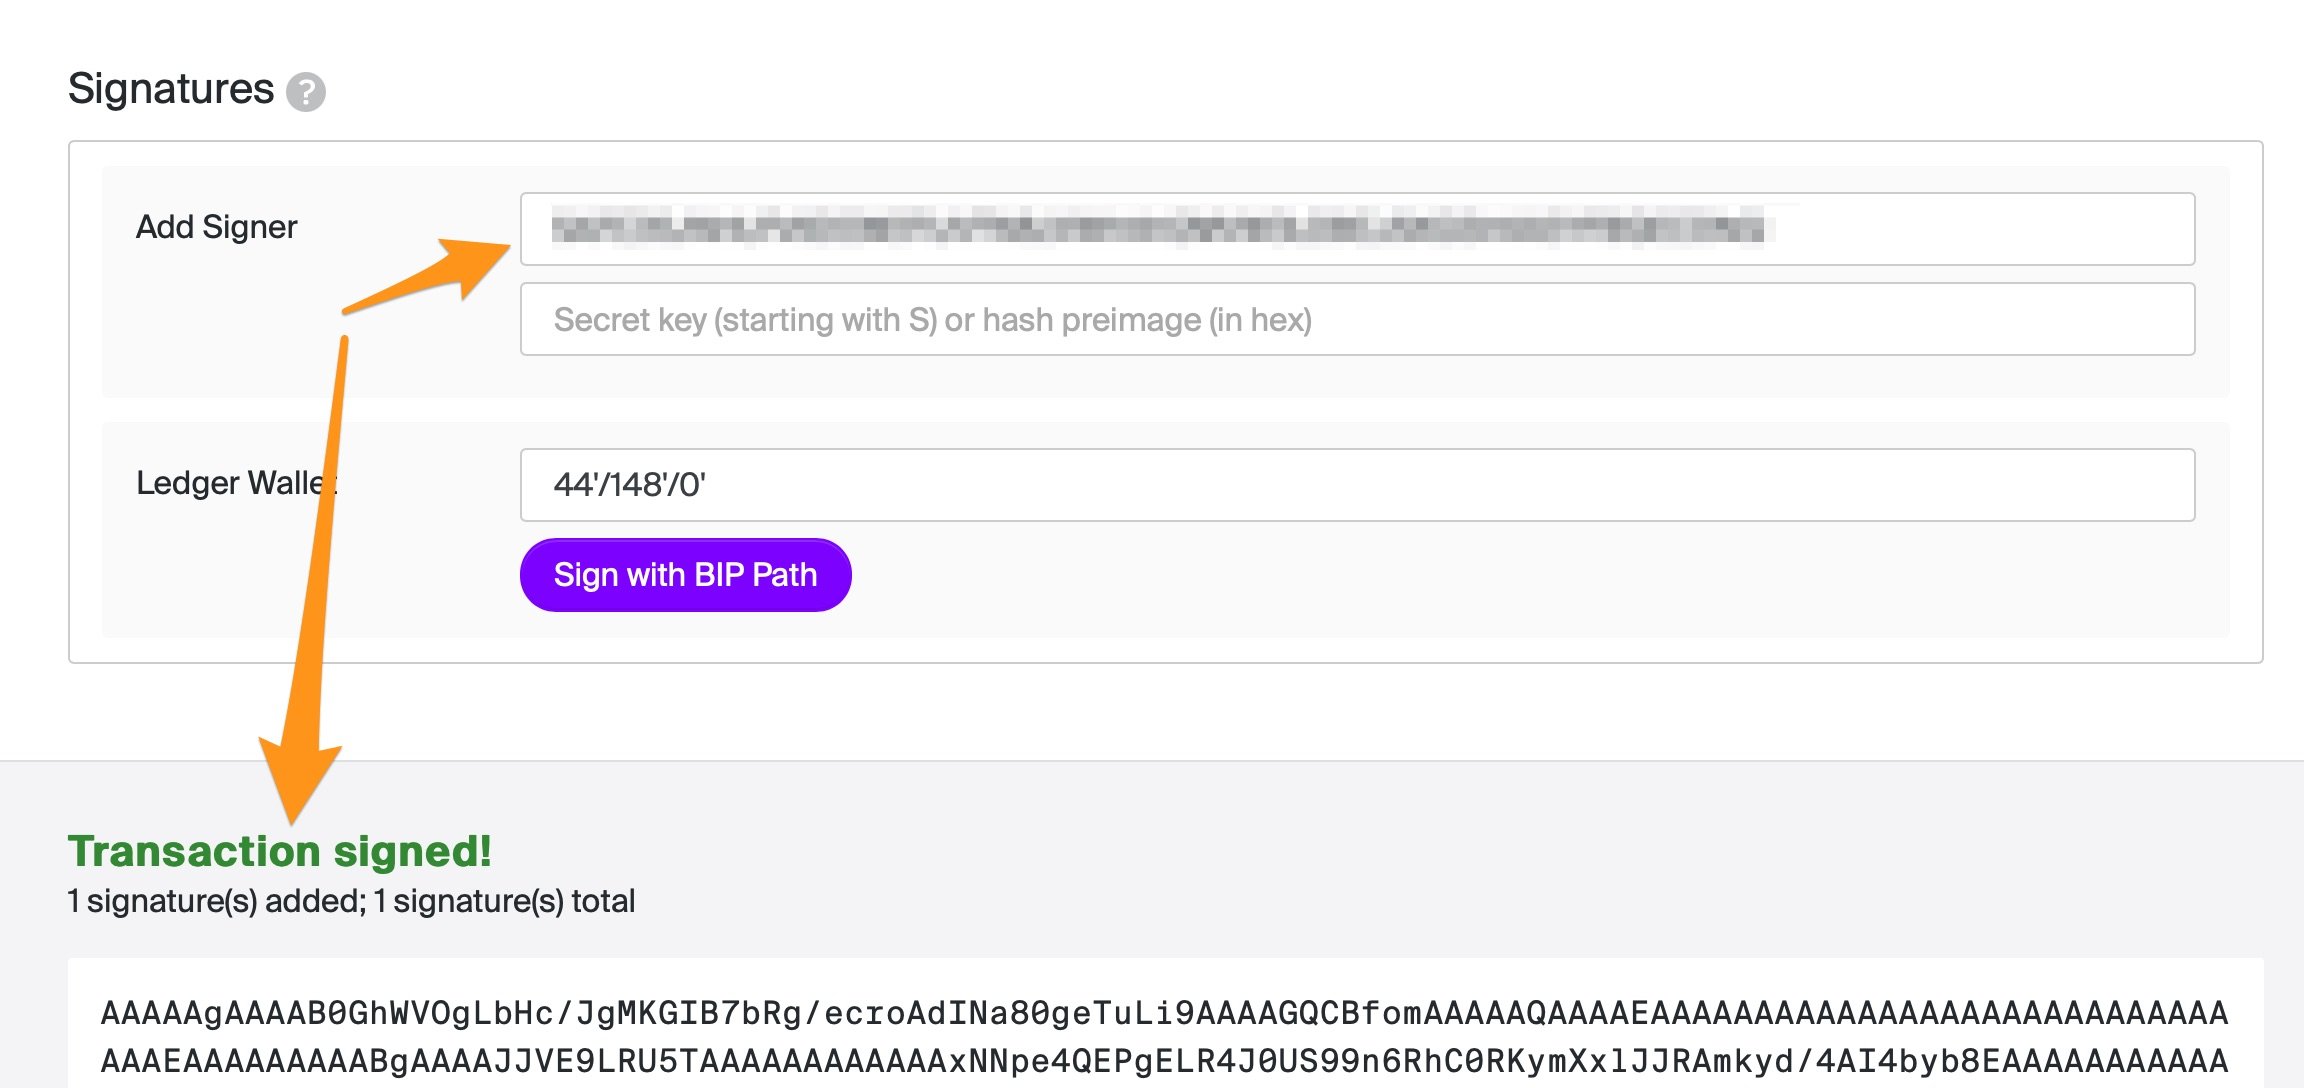
Scroll to the bottom and click the button that says "Sign in Transaction Signer":

Paste your Distribution private key, you should see a "Transaction signed!" message below:
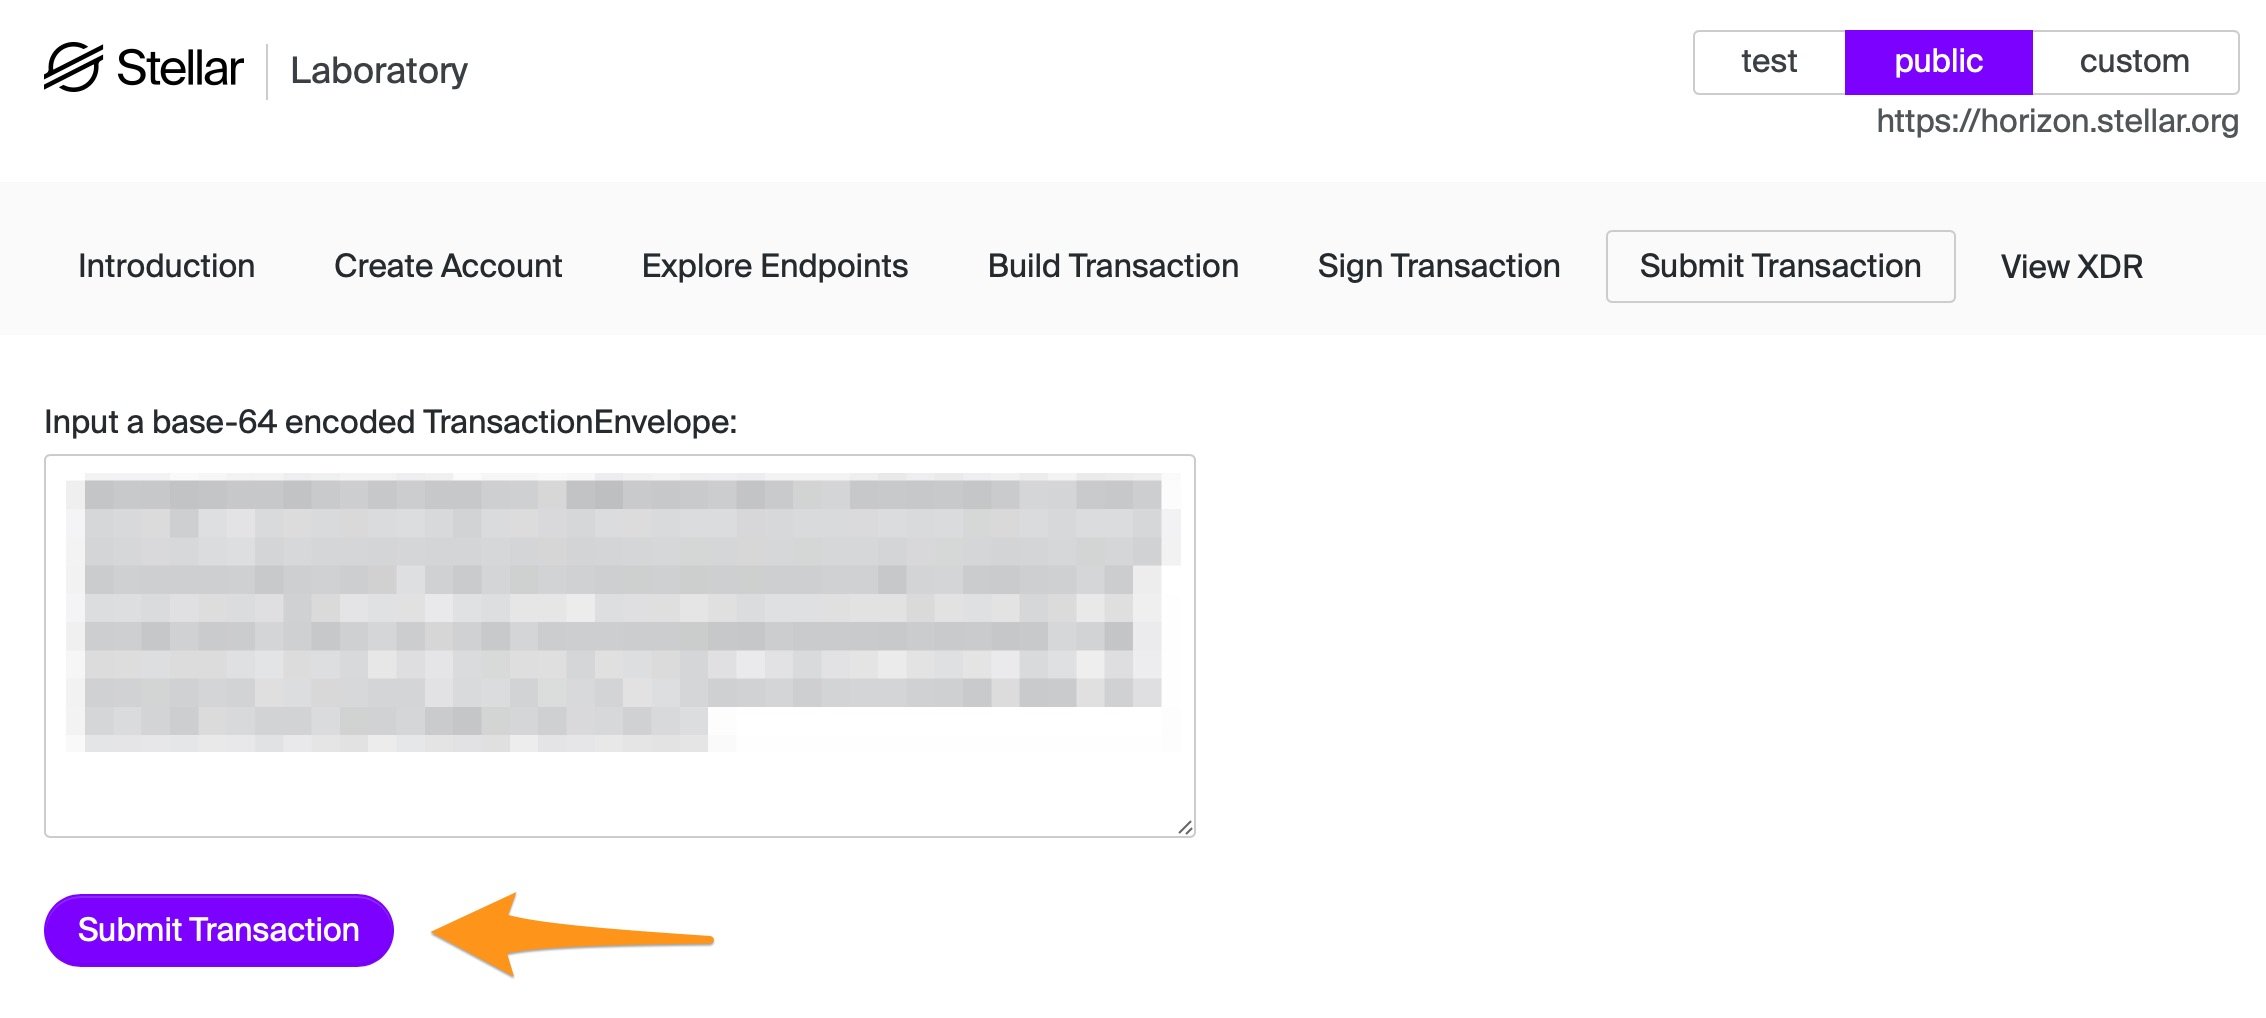
Scroll down and click "Submit in Transaction Submitter":

Finally you should see a page that lets you "Submit Transaction":
All done!
4. Generate your tokens :)
Back to your https://laboratory.stellar.org/#txbuilder - clear the form contents, paste your Issuer public key into the Source account field and get the next sequence number again.
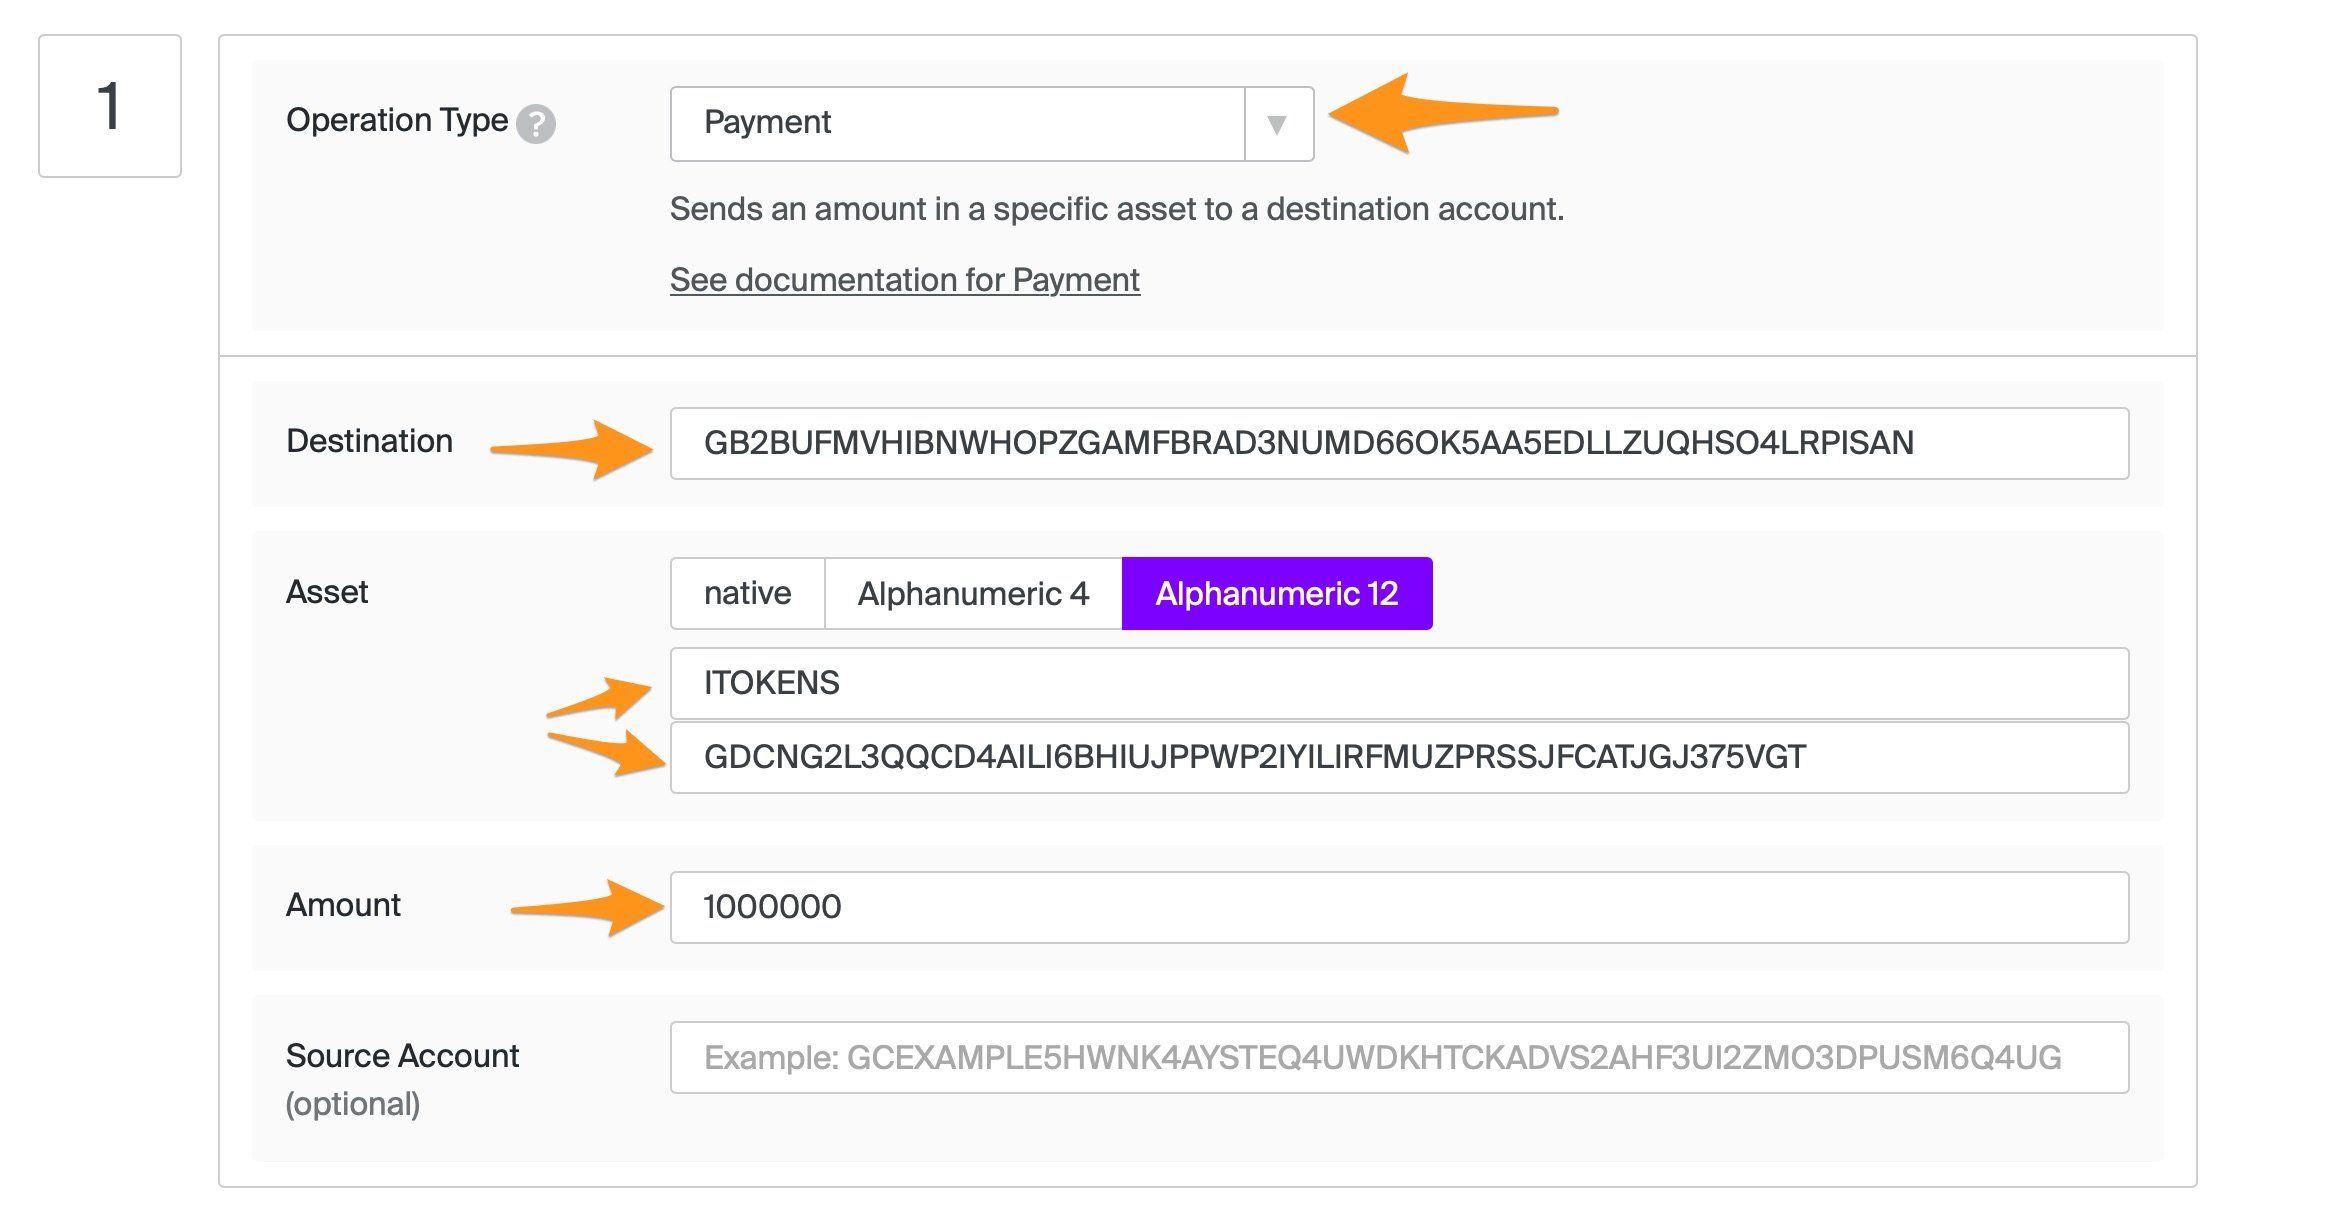
Scroll down - select Payments, paste in your Distributor public key to the Destination field, repeat your token naming your used earlier plus paste in your Issuer public key.
Define the number of tokens you'll pay in to the Distributor account.
At the bottom, click "Submit in Transaction Submitter", and this time use the Issuer private key to sign this transaction.
5. Check your work!
Use a tool like Stellarchain.io with your Distributor private key to see that all has worked as you expect. For the token I just created, I see that my ITOKENS token is setup and ready for the world to use :)
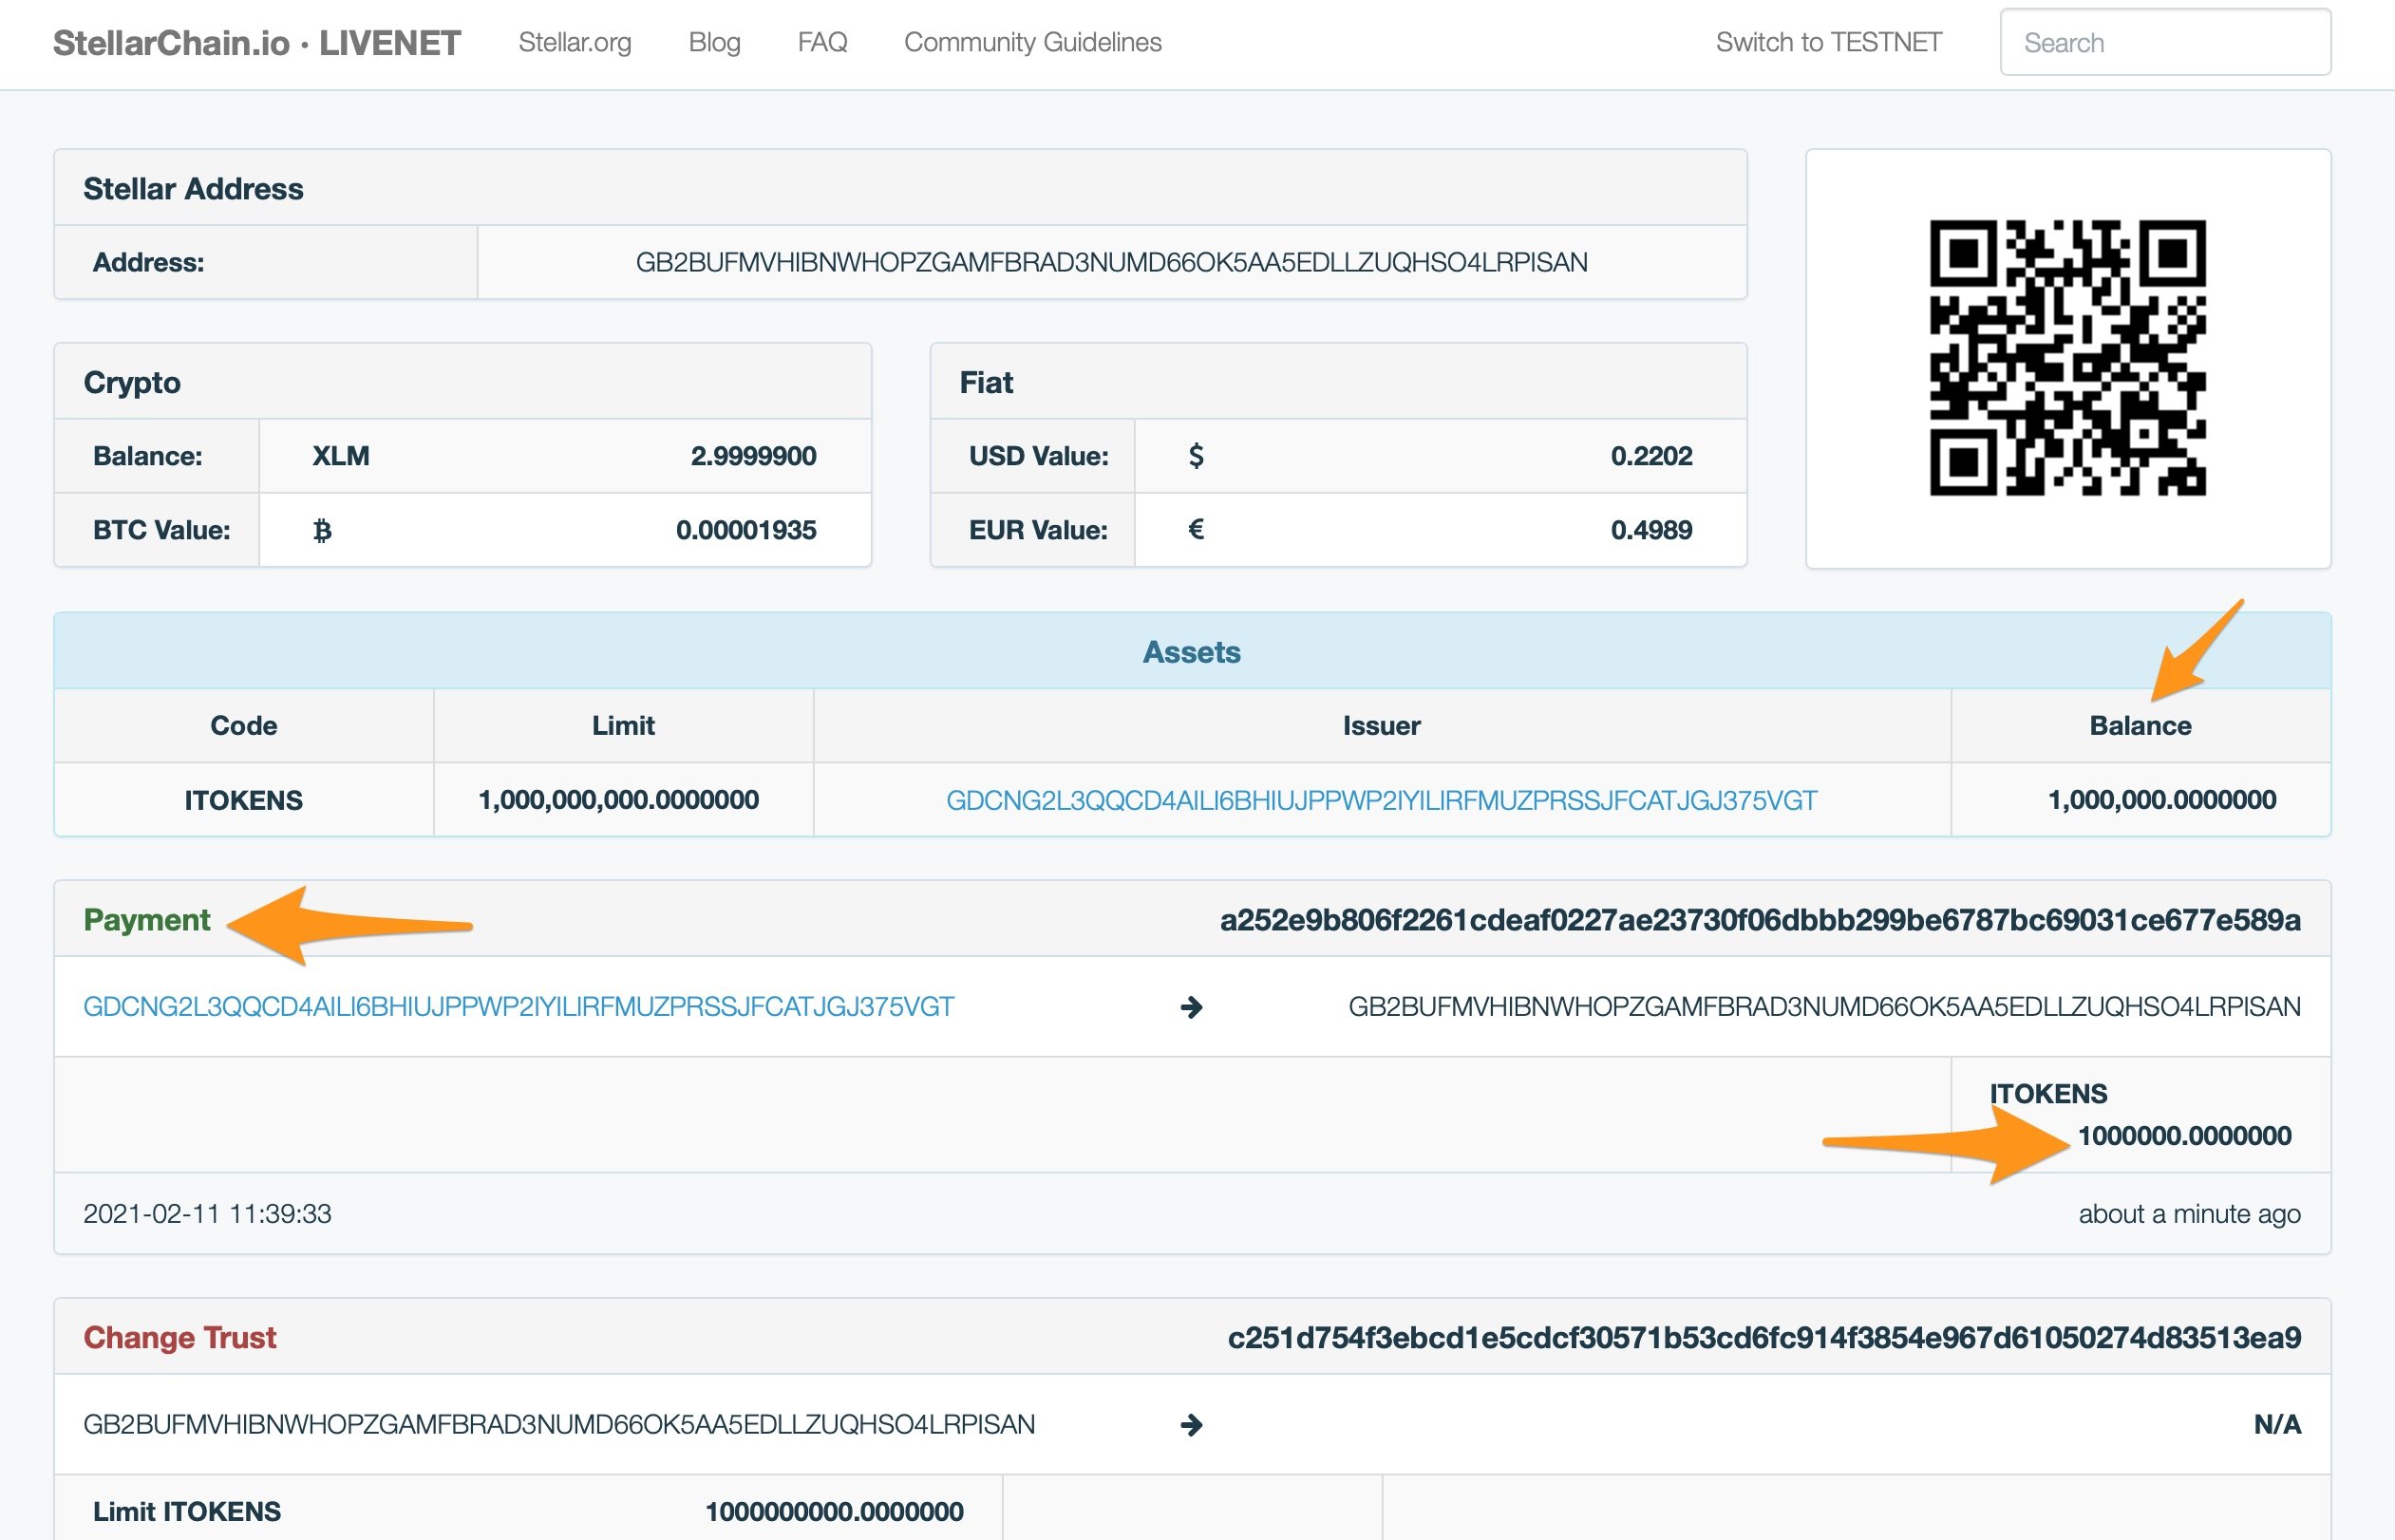
(Note, in my example I made a lower payment to the distributor account than I set in Step 3 - most often you might want to make the initial distribution of your token the same values here)
Token use cases inside Task
Now you have your own branded token, what will you do with it? You could allow it to become a tradable token on exchanges, or you may want to use it as a stable coin. Task also provides you with a number of useful Stellar token uses such as:
- Sending a payment to a team member who has completed an activity using the mobile app (setting this up is covered here)
- Sending Peer to Peer payments or Awards (from the timeline) with messages to reward and connect people within your communities
- Storing data that is being collected by your organisation inside the Stellar blockchain for longterm data veracity and proof of work done (that increases the support for your work)
I hope this has been useful - shout out to the Lumenauts who created a useful howto I referenced when documenting this, they have other articles you may find useful.
I'd love to hear your comments and feedback (also shout if you want to come Kiting in Hua Hin!), and if you'd like to learn more then click the button below to set up a time to talk.


Share this
NFTs - How can you digitise your next major gift?

4 Ways Sustainable Marketing is Easy with The Blue Marble (Earth Day Special!)